Complete Guide to Installing Perforated Cable Trays
This article covers installation, benefits, and key considerations for perforated cable trays, including galvanizing, stainless options, fittings, and a comparison of cable management methods.
خلاصه تخصصی مقاله
This article covers installation, benefits, and key considerations for perforated cable trays, including galvanizing, stainless options, fittings, and a comparison of cable management methods.
موضوعات اصلی: perforated، cable، tray، trays، installation، steel
The perforated cable tray is commonly used to manage electrical and telecommunications cabling. This guide explains installation, benefits, and key considerations such as galvanizing, stainless options, and fittings, with practical steps for proper setup.
Introduction
Perforated cable trays are used to organize electrical and telecom cabling. They allow grouping of cables using separators and facilitate access on complex routes. Compared with other tray types, perforated trays can simplify installation, especially in networks with branching and multiple routes. This article explains how to install and effectively use perforated cable trays.
What you will learn
- Installing perforated cable trays
- Advantages
- Ease of installation
- Operational benefits
- How to install and fabricate perforated trays
- Hot-dip galvanizing
- Stainless steel perforated trays
- System integration for installation
- Types of fittings
- Comparative table of cable management methods
Benefits
- Lifetime up to 20 years
- Ability to carry up to 110 kg per meter length
- High-quality galvanization around 1000–1200 g/m2
- Coating thickness 9–12 micrometers
- Fire resistance up to 90 minutes
- Sizes: height 30–100 mm; base width 50–600 mm
- Multi-level design with easy access to cables
- For detailed installation guidance, consult network support professionals
Simplicity of installation
- Branching and bending with hands without special tools
- Multipurpose fittings
- Lightweight
- Very high installation speed
- Safe construction
Operational ease
- Natural ventilation for cooling of cables
- Easy access to cables and better management
How to install perforated cable trays and how they are built
The galvanizing process typically deposits zinc on metal surfaces in a zinc-containing electrolyte. Prior to galvanizing, surface cleaning is required and the coating thickness is usually 9–12 micrometers.
Hot-dip galvanizing
In this process, cold-rolled steel used for trays is immersed in molten zinc, forming a protective coating of about 1000–1200 g/m2.
Stainless steel perforated tray
Stainless steel trays are suitable for chemical and food industries and in processes with high corrosion risk; surface finishing may include electropolishing for improved corrosion resistance.
System integration for perforated tray installation
- Grounding clamps for trays
- Roof supports for FBA-30 perforated trays
- Coatings for BM perforated trays
- Mounting boards
- Cable bend-radius restrictors
- Das-shaped profiles for FPL-21 trays
- Interface plates with a central hole
- Hanging plates for tray suspension
- Conversion from perforated tray to sheet tray
- Perforated tray models and connectors
- Light coatings for trays
- Connector assemblies for installation
- Socketless connections
- Suspension with threaded pins
- Wall mounting options for vertical installation
- Grounding clamps for trays
- Connector assemblies for base installation
- Tray height 50 mm
- Covers and lids
- Grounded lids for safety
- Base assemblies for floor mounting
Types of tray fittings
- Wall-mounted fittings
- Two-pin tray suspensions
- One-pin suspensions
- TM connectors for wall or floor
- Ceiling suspensions with SSM
- Wall-mounted connections
- Non-standard ceiling fitting methods
- Pins with clips
- Hanging from galvanised ceilings
- Various fixed or clip-based connections
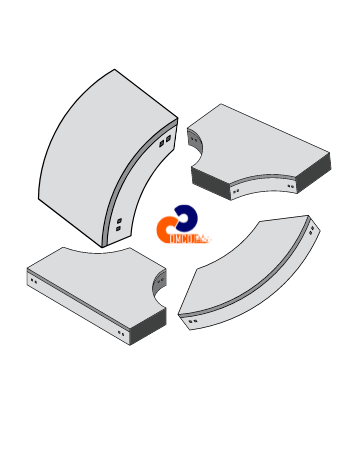
- T-junctions
- Reducers
- Stairs-shaped connectors
- Tool-free connections
- Seven-socket tray connections
- Perforated plates with holes
- Small radius bends
- Vertical bends
- Large radius bends
Table comparing cable management methods
| Features / Methods | Perforated cable tray | Closed cable tray | Plastic duct | Cable ladder |
|---|---|---|---|---|
| Weight | Light | Relatively heavy | Very light | Heavy |
| Ventilation | Excellent | Moderate | Poor | High |
| Installation speed | Very high | Moderate | High | Low |
| Access to cables after install | Very easy | Moderate | Very difficult | Difficult |
| Aesthetics | Industrial-appropriate | Office-appropriate | For small offices | Industrial and less aesthetic |
| Heat and fire resistance | High (90 minutes) | Moderate | Low | High |
| Installation and maintenance cost | Economical | Moderate | Low | High |
| Branching and routing flexibility | Very easy | Difficult | Very difficult | Medium |
| Use in network projects | Yes (network cabling) | Yes | No (for light electrical) | Yes (in long industrial paths) |
برای ارزیابی پایداری، امنیت و نگهداری این زیرساخت، راهنمای پشتیبانی شبکه را نیز مطالعه کنید.