What is network trunking? Installation and deployment guide
This article explains network trunking, its differences from ducting, and practical steps for installing and deploying trunking in a network.
خلاصه تخصصی مقاله
This article explains network trunking, its differences from ducting, and practical steps for installing and deploying trunking in a network.
موضوعات اصلی: پشتیبانی شبکه، ترانک، شبکه، نصب، کابلها، داکت
Today we discuss one of the passive network components, known as network trunking. Trunking is an important network component with its own specific applications. If you recall, in previous articles we discussed passive network equipment and one of these items was trunking, for which a brief explanation was given. In this article we provide a comprehensive look at network trunking, how to install and implement it, and we review its advantages and differences with ducting. The main goal is to share practical tips for installing network trunking and understanding its difference from ducting. If you are interested in network equipment, join us for valuable information.
Network trunk
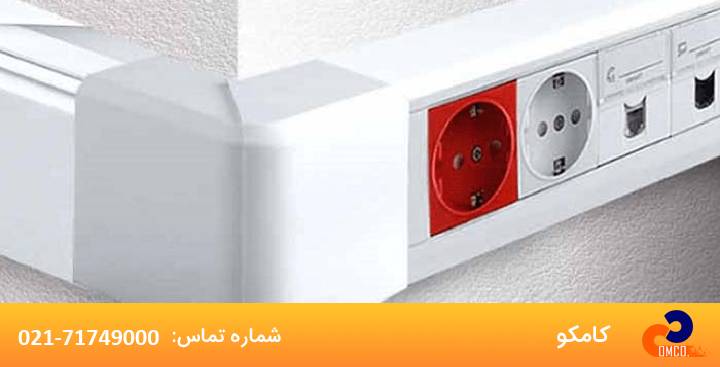
Network trunking is essentially a wide enclosure that allows direct installation of outlets and related mechanisms on it. The method works by first mounting a frame on the trunk and then attaching the relevant outlets to the frame. The trunking system protects cables from dust and water ingress. A trunk is typically a rectangular-profile enclosure with one side open, used to protect cables and create space for other equipment.
Contents
- What is network trunking?
- What are the advantages of network trunking and its applications
- What is a duct?
- How to install network trunk
What is network trunking?
Trunking is a method used in network maintenance. It provides network access to many users by sharing multiple lines or frequencies. As the name suggests, trunking systems resemble a tree with a trunk and multiple branches. It is more commonly used in radio and high-frequency communication systems. Trunking can serve as network support services and hardware while controlling several signals simultaneously. Trunking data can include voice, video, and control signals.
What are the advantages of network trunking and its applications
We often use trunking in network setups when we cannot run cables through walls without damage. Of course, embedded cabling has its own benefits, but sometimes cabling is temporary, making trunking a good method for such installations in network support. The advantages of trunking include the following:
- In addition to organizing wires, trunking improves the aesthetics of the environment by covering cables and preventing clutter.
- Installing trunking increases the life of cables because trunking acts as a protector against tearing and damage.
- Trunking helps prevent cables from getting wet or corroding.
What is a duct?
To better explain trunk installation, we first need to understand network ducting. A duct is a channel with a door for cable passage, typically made of plastic or PVC. Ducts are used to route network, electrical, and telephone cables, among others.
How to install network trunk
When planning the installation, first determine the type and number of outlets required. This is part of the network design. Then choose a trunk that can accommodate the required cable capacity. If considering future expansion, account for space. If you also run power cables inside the trunk, consider whether to use partitions. Then determine trunk routes, typically between user nodes, racks, fuse boxes, and other end items. This should be done with aesthetics and avoidance of impassable obstacles in mind. The installation height from the ground is typically around 40–70 cm, but may vary in special conditions. Then mount the cage, face plate, outlets, and other elements on the trunk.
When selecting trunking, opt for reputable brands to ensure quality. Attach the trunk to the wall with screws and minimize the use of adhesive. Our recommendation is to seek help from a professional to ensure all steps are carried out effectively.
Steps for installing network trunk
Step 1: Prepare required equipment
1) Choose trunk appropriate for the number of cables and installation environment
2) Prepare trunk accessories including corners, tees, covers and brackets
3) Use drill, screws, wall plugs and a tape measure for measurement and installation
Step 2: Determine installation path
4) Determine the routing on wall or floor
5) Mark connection points and corners with pencil or marker
6) Ensure there are no obstacles (for example electrical outlets or plumbing lines)
Step 3: Install main trunk body
7) Cut trunk to appropriate sizes with a cutter or plastic saw
8) Drill holes on wall or floor for trunk mounting with a drill and plugs
9) Fix the trunk body with suitable screws
Step 4: Pass cables and close trunk cover
10) Route network and power cables inside the trunk without severe bending
11) Use cable ties to prevent wire tangling
12) Close the trunk cover and fix all fittings (such as corners and tees)
Step 5: Final check and performance test
13) Inspect the trunk path and ensure the covers are secure
14) Test the network to ensure there are no cuts or cable interference
15) Final cleaning and handover of the cable route to the client
Difference between duct and trunk
DUCT is made of plastic and is used to hide wires. DUCT is smaller in size than trunk and can accommodate fewer cables. DUCTs can separate electrical and network cables, whereas trunks allow outlets for electrical and network on themselves. Trunking is generally more resistant to fire, heat, and impact, offering advantages over ducts.
For evaluating the stability, security, and maintenance of this infrastructure, the network support guide is useful.
برای ارزیابی پایداری، امنیت و نگهداری این زیرساخت، راهنمای پشتیبانی شبکه را نیز مطالعه کنید.